![]()
DRAKOPF2 is a Single Player and Multiplayer level. This level features the castle Drakopf, lair of a cult that worships a Dragon God.
The castle features a gateway in the shape of a dragon head, a sewer, and an altar to the Dragon God.
This level was intended to originally be part of DRAKOPF, and in-game still has the same name, but was broken apart due to size constraints.
Quick Level Completion
- Head into the next room, then drop into the Water to your right.
- Turn right, then swim into the next room before turning left.
- Swim to the wall, then turn right and head up the stairs.
- Turn right and head to the middle of the room, then turn left.
- Press the Button, then retrace your steps to the start of the level.
- Look towards the mouth of the dragon, then shoot the Button above it.
- Head across the Drawbridge, then proceed through the doorway.
- Turn left to head to the wall, then turn right.
- Go through the doorway, then cross the courtyard and head up the stairs.
- Hit the Shootable Wall to cause it to open, then enter the next room.
- Turn left, then follow the corridor to your left.
- Ignore the Gold Door to the right, instead turning around.
- Head down the staircase to your right, then head to your left through the next doorway.
- Continue down the corridor and into the next room, then turn left.
- Head through the doorway and down the ramp, then turn left.
- Continue down the ramp and turn left, then head down the next ramp.
- Turn right, then head down the next ramp and proceed to the wall.
- Turn right, then proceed into the Water and continue to an intersection.
- Once more turn right, then follow the corridor to your left to reach another intersection.
- Turn left, then follow the corridor to your right to reach the next room.
- Drop into the Water and turn around, then collect the Gold Key in the middle of the room.
- Retrace your steps to the Gold Door and go through it.
- Proceed to the wall straight ahead, then turn right and head up the stairs.
- Turn left and cross the next room, then turn left.
- Head up the stairs and turn left, then head up the next flight of stairs.
- Turn right, then head up the stairs as they turn to the right.
- Turn right at the top, then head through the next doorway.
- Turn right once more, then proceed forward to an intersection.
- Enter the next room by turning right.
- Use the lower side of the bars in the middle of the room to reach the middle of it.
- Press the Floorplate, then return to the intersection and proceed forward.
- Head to the wall, then turn right and continue to the next wall.
- Turn right, then step onto the stairs and turn right.
- Drop to the floor below, then proceed forward across the room.
- Kill the Zombie in the alcove to your right to cause the Doors to open to your left.
- Head through the newly opened doorway, then continue forward to exit the level.
Walkthrough
DRAKOPF2
Kill the Rottweiler in the mouth of the dragon to your left. Proceed forward into the open area, then turn left to collect the Shells. Turn right and drop into the moat of Water, then turn right and swim to the far wall. Turn left, then swim to the next wall. To your left is a set of Bars that are currently locked, turn right and head up the staircase to exit the Water. Turn right once more, then kill the 2 Knights and the Death Knight. Proceed to the middle of the room, then turn left to hit a Button. The message "the main gate has been opened" will be displayed; this opens a Movable Wall that blocks the dragon gate from the rest of the level. Head through the set of Bars, which has been opened by the Button, then turn right to reach an alcove (#1). Retrace your steps to the starting area, then look towards the mouth of the dragon. Shoot the Button above the dragon's mouth to cause a Drawbridge to temporarily extend from the mouth. Jump onto the Drawbridge, then move across to get past a pit of Lava. Turn right to kill the Scrag, then turn around to kill the Death Knight. Head down the corridor to collect the two 15 Health, then turn around and head to where the Scrag was to collect the Nails. Turn around once more and return to the intersection, then turn right. Head through the doorway, but beware of the Nail Trap firing from the left. Turn left to head to the wall, heading underneath the Nail Trap, then turn right.
Kill the Rottweiler through the doorway, then enter the courtyard. Straight ahead is a staircase leading to a Shootable Wall, ignore this for the time being. Instead, turn right to kill a Scrag through a window. Turn left, then continue to the middle of the courtyard before turning left once more. Kill the Ogre on the balcony above you. Turn around once more, then head to your left to reach a Floorplate. Press the Floorplate to open a Movable Wall in front of you, then proceed through the doorway. Turn right to collect the four 25 Health and Green Armor, then turn around. Cross the corridor while collecting the 4 Shells, 3 Nails, and Rockets. Exit the alcove and head to the balcony where you killed the Ogre, then head to your right to reach an Elevator. Turn left and step on the Elevator, then get off on the middle floor. Cross the thin beam to your right to reach the opposite section of platform, then collect the Shells and 25 Health. Return to the Elevator and ride it to the top floor, then proceed forward onto the platform. Ignore the doorway straight ahead, instead heading up another Elevator to your right to reach the towers of the castle. Turn left, then follow the beam to the head of the dragon gate to collect the Rocket Launcher. Proceed forward to the tower opposite the one you started on, then collect the 2 Rockets. Turn left, then drop to the floor below to reach a balcony opposite the Ogre balcony.
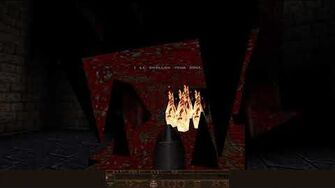
Continue forward through a doorway, then turn left and jump on the ledge. To your left is a hole leading to the lower floor of an area just past the Shootable Wall, instead head up the ramp to your right. Collect the Quad Daamge in the middle of the room at the top of the ramp, then retrace your steps to the balcony below the tower you dropped off. Enter the doorway to the tower, straight ahead is the start of a spiral staircase that will bring you to the area near the Scrag window. Turn right to kill the Death Knight, then head through the doorway to kill another Death Knight on the opposite side. Straight ahead is a doorway leading back to the Ogre platform, turn right and jump on the ledge. Drop to the floor below to return to the courtyard, then head up the stairs you previously ignored. At the top is a Shootable Wall, touching it will display the message "kill me". Hit the Shootable Wall to cause it to open, then kill the Knight to your right. Proceed forward towards the altar, then turn left to kill a Knight in the corridor to your left. Touching the altar will display the message "I ll swallow your SOUL". Turn around, then head into the doorway to your right. Cross the corridor, ignoring the Elevator to your right which leads to the balcony just before the Quad Damage. Turn right at the end to reach the corridor with the Scrag window, head down it to collect the three 25 Health.
Return to the altar and head down the corridor you previously ignored. To the right is the Gold Door, instead turn around and head down the staircase on the opposite side of the corridor. Turn left to kill the Rottweiler in the alcove to your left. Turn right and head through the doorway to your left, then continue down the small corridor. Kill the Ogre to your right, then head to the middle of the room and turn left. Head through the doorway and down the ramp, then turn left. Kill the Scrag, then continue down the next ramp before turning left. Head down the ramp and turn right, then head down the next ramp. Continue to the wall, then turn right and kill the Ogre. Continue forward into the Water, then proceed forward to an intersection. Turn left, then follow the corridor to your right to kill the Zombie. Continue down the corridor, then turn right to kill another Zombie. Turn around, then follow the next corridor to your right to collect the Rockets at the end. Retrace your steps to the intersection, then follow the opposite corridor until you reach another intersection. Turn left, then follow the next corridor to your right to kill the 2 Zombies and the Scrag. Continue into the next room, then drop into the deeper Water and turn around. Swim down to collect the 25 Health, then swim to your left to collect another 25 Health. Cross the room by swimming to your right to collect the Gold Key and 15 Health. Swim to your left to collect the 15 Health, then retrace your steps to the previous intersection. Head down the corridor you previously ignored, following it as it turns to the left. Kill the Zombie in the corridor, then continue forward to an intersection. The left end of the corridor is useless, so instead turn right to collect the Rockets at the opposite end of the corridor.
Retrace your steps to the Gold Door, then head through it. Proceed to the wall straight ahead, then turn right before killing the 2 Rottweilers. Head up the stairs and turn left, then kill the Ogre. Head to the upper right corner of the room and drop into the hole, then turn left to reach a corridor (#2). Head to the opposite side of the room, then turn left to head up the stairs. Turn left once more, then head up the next flight of stairs. Turn around to kill the Death Knight on the balcony above you, then turn left. Follow the stairs as they turn to right right while killing the Knight, then turn right at the top. Continue through the doorway, then turn right to kill the Ogre. Head down the corridor to an intersection, then kill the Knight in the dark alcove to your left and the Death Knight that will become alerted through the doorway in front of you. The alcove to your left has a Door at the end of it, but it is currently locked. Turn right to kill a Vore inside of a structure, then turn left to look through the Death Knight door. Cross the room, then collect the 2 Nails to your left and 2 Rockets to your right. Return to the room with the Vore and enter it. Hit the Shootable Wall to your left, the one with the bloody Quake logo, to reveal a corridor beyond (#3). Use one of the lower sides of the bars in the structure to get to the middle of the room, then press the Floorplate. The nearby dark alcove with the Knight will open a set of Doors, revealing a corridor beyond. Enter the newly revealed corridor, then kill the Ogre to your right. Proceed to the wall before turning right, then move forward to the next wall. Turn right once more, then head down the stairs to reach a room filled with platforms separated by Lava.
Turn right, then cross the room while passing an empty alcove on your left. Collect the 2 Nails in the alcove to your left, then return to the stairs. Head up the stairs, but turn left at the top and drop to the floor below to reach the opposite side from the Nails. Turn around, then head to your left to collect the two 15 Health. Turn around, then kill the Zombie in the alcove to your right. Continue forward to the next alcove, then kill the Zombie in the alcove to your right. Continue forward to the next alcove, then kill the Zombie in the alcove to your right. To your left is a large series of Doors that are currently locked, touching them will display the message "we are not all dead". Continue forward to the next alcove, then kill the Zombie in the alcove to your right to open the Doors. Note that only the final Zombie in the series of alcoves needs to be killed for the Doors to open. Turn right into the Zombie alcove, then drop into the Lava on the far side. As you land at the bottom you will collect a Pentagram of Protection. Return to the room above and head through the set of opened Doors. Straight ahead is the exit Teleporter, but head around it to collect the two 25 Health and Green Armor. Head through the Teleporter to exit the level.
Differences from Easy to Normal
- Death Knight below the Scrag in the dragon gate.
- Ogre in the side area with the Button opening the main gate.
- Ogre on the middle platform of the wooden structure in the courtyard.
- Death Knight in the courtyard, beside the doorway leading to the spiral staircase.
- Death Knight on the balcony in the courtyard, beside the doorway leading to the Quad Damage above the altar.
- Fiend in the dragon altar, just beside the Shootable Wall.
- 2nd Knight in the dragon altar, diagonal to the other Knight.
- 2nd Knight between the staircase to the sewer and the dragon altar.
- Death Knight next to the Scrag window corridor, beside Elevator leading to area beside Quad Damage above the altar.
- 2nd Rottweiler in the alcove just below the staircase beside the Gold Door.
- Scrag at the top bend of ramps between the sewer and rest of the level.
- Zombie slightly to the right of the first intersection of the sewer.
- Scrag just before the inner intersection of the sewer.
- 3rd Zombie in sewer tunnel leading to Gold Key room.
- Zombie at dead end across from Rockets, section accessible by intersection also leading to Gold Key room.
- 2 Zombies beside the Gold Key.
- Fiend just past the Gold Door.
- Knight on lower section of staircase just after the room with (#2).
- Scrag at the bend of the staircase just after the room with (#2).
- 2nd Knight beside the Door leading to the exit section.
- Scrag in the Death Knight room beside the Vore room.
- 2nd Ogre on the upper floor of the exit section.
- 2 Scrags in the exit section, 1 on each side of the room from the entrance corridor.
- Shambler in the exit room.
Secrets
| Secrets | ||
|---|---|---|
| (#1) |  |
Press the Button in the side area outside the castle to cause the set of Bars to lower. Swim through the opened Bars, then turn right and climb onto the alcove. Collect the Nails, Shells, 25 Health, and 15 Health. |
| (#2) |  |
In the first Ogre room just past the Gold Door, drop into the upper right corner from the entrance to reach the floor below. Turn left and head through the doorway to reach a corridor, then turn left. Head to the wall, then turn right before moving forward. Turn right once more, then head down the corridor to collect the Nails and Super Nailgun. Return to the bottom of the hole you dropped down, then look towards the entrance of the upper floor. Proceed forward, towards the flames, to cause a Movable Wall to quickly lower and a Secret sound to play. Proceed forward towards the fire, then quickly sidestep to either the left or the right to avoid getting injured. You have just traveled through the mouth of the dragon altar. |
| (#3) |  |
In the room with the Vore, hit the Shootable Wall with the Quake logo to reveal a hidden corridor. Turn left to reach an Elevator that will in turn bring you through a Teleporter. Head to your left to collect the 100 Health, then turn around. Collect the Quad Damage to your right, then follow the ramp beside it while turning right. Turn around at the bottom, then head to your left to drop into a hole. This in turn will lead you to (#4). |
| (#4) |  |
Follow (#3) and drop through the hole at the end. A Movable Wall will open to your left, allowing access to the Death Knight room near the Vore room. |
Enemies
| Type | Count | ||
|---|---|---|---|
| Easy | Normal | Hard/Nightmare | |
| Rottweiler | 5 | 6 | 6 |
| Zombie | 9 | 14 | 14 |
| Knight | 6 | 10 | 10 |
| Scrag | 4 | 10 | 10 |
| Ogre | 6 | 9 | 9 |
| Death Knight | 6 | 10 | 10 |
| Fiend | 0 | 2 | 2 |
| Vore | 1 | 1 | 1 |
| Shambler | 0 | 1 | 1 |
| Total | 37 | 63 | 63 |
Deathmatch

DRAKOPF2 (Deathmatch)
Differences
- Nailgun and Nails beside Button in side area outside castle.
- Double-Barrelled Shotgun on the middle floor of the wooden structure in the courtyard.
- Double-Barrelled Shotgun in the room just below the staircase next to the Gold Door.
- Thunderbolt and Cells in sewer, corridor opposite side leading to inner intersection.
- Thunderbolt and 2 Cells beside Floorplate opening up the Doors leading to the exit section.
- Grenade Launcher at bend of upper floor of exit section.
Spawn Locations
- Dragon gate, opposite side with Nails.
- Window corridor overlooking courtyard. (corrupt)
- Outside of castle, side closer to side area, dragon gate side.
- Outside of castle, side further away from side area, dragon gate side.
- Underneath wooden structure in courtyard.
- Beside dragon altar, side closer to Gold Door.
- Thunderbolt and 2 Cells room, beside wall to (#3).
- Corridor just after Gold Door.
- Platform beside sewer, near ramps leading to rest of level.
- Room above ramps leading to sewer. (corrupt)
- 2 Nails and 2 Rockets room.
- Room with intersection leading to exit section, far side from intersection.
| DRAKOPF | Custom Levels | E4M2: The Tower of Despair |