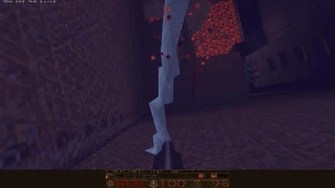
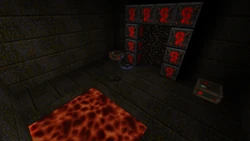
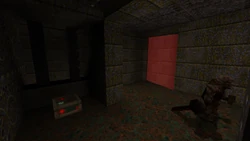
Ziggurat Vertigo is the eighth and Secret Level of the Dimension of the Doomed. Entirely indoors, the action takes place in a complex temple-like structure surrounded by pools of deadly Lava. The map consists of a large square with multiple floors, the layout is relatively symmetrical outside of some key landmarks.
The gravity for this level is 1/8th standard gravity, leading to disorienting effects and some interesting physics and level design, featuring longer jumps and falls than usual. This level also introduces the Rocket Launcher.
Quick Level Completion
- Take the Elevator to the left.
- Take the first doorway to the right.
- Jump to the highest platform and press the Button.
- Return to the start and enter the pyramid.
- Jump and press the Button to the right.
- Drop to the floor and take either Elevator.
- Jump to the central platform and press the Button.
- Drop to one of the platforms below and go through a doorway into the building.
- Collect the Silver Key on a pedestal in a back room.
- Exit the building and jump to the corridor on the left with the Silver Door.
- Open the Silver Door and take the corridor to the right to the exit.
Walkthrough

E1M8 - Ziggurat Vertigo
When the level starts you will float down to a sunken square. Kill the Ogre that is on a high platform you are facing. Jump out of the sunken square and collect a 25 Health beside it. To the right are some Shells. Grab the Pentagram of Protection and dive into the Lava to get to an alcove with two 25 Health and a Quad Damage, as well as a Teleporter leading back to where you dived in the Lava (#1). Go forward and grab the Yellow Armor. Exit the building, go around the pyramid, and jump onto the platform located on its back. Once there collect the Nails. Facing the wall of the edge of the room, go to your left onto a platform with 25 Health, Shells, and Nails. Go back to the right and keep going onto a platform with two 25 Health. Turn right and jump onto a platform with two 25 Health, Shells, and Rockets. Now go back to the bottom floor and ride the Elevator by the starting location up to the top. Kill 2 Ogres when you reach the top, one to the left and one to the right. Kill another Ogre at the end of the hallway. In the middle of the hallway turn right to collect a Rocket Launcher. Go into the right hallway closer to the end Ogre and collect the two 15 Health and 2 Nails. Returning to the main hallway of this level, turn right through one of the doorways and kill the Scrag. Jump onto the above platform and kill the Ogre. Also kill the Ogre on the higher platform in the middle. Collect the Rockets and Nails from the lower platform. In the left lower corner is another raised platform with Nails. Another raised platform in the left upper corner contains Yellow Armor. Jump to the middle platform, collect a 100 Health, and hit the Button.
Using any route possible, make your way back to the lower floor. Go to the right and enter the previously locked area. Collect the Shells. Following the outer rim of the platform beside the Lava collect the Shells along the route and the Rockets at the end. Go to the middle of this platform area and follow the other platform that leads into the Square building and collect the two 15 Health. Straight ahead is a passageway back to where the Yellow Armor was. Jump in the middle of the room and kill the Ogre on the platform above. The platform continues on to the right and leads to two 25 Health and Shells. Press the Button here to unlock 2 Elevators on the Lava platform. Go back to that room, but instead of going there, go to the entrance you initially entered from that should be on the left. Jump on the platform that creates a doorframe to collect two 25 Health. Turn right and jump to the roof of the building, where you may collect the Nails. Kill the Ogre on a platform that is in the same area but higher from the initial entrance to the room. Across the building you can see a texture of a crucified creature with a hole that can be jumped to, with a 100 Health inside. Jump to the platform you killed the last Ogre at and collect the Rockets and Nails. Turn left and jump to a higher platform while killing the Ogre. If it is too difficult, you may also use the Elevator on the bottom floor located on the same side. Collect the Nails at the top. Jump to the big building beside you and kill the Scrag and Ogre at the top. Collect the two 25 Health.
Jump to the top of the Elevator that you could have used which contains two 25 Health. Turn around and look a little to the right of the building to kill an Ogre. Jump to the platform to collect the Rocket Launcher. Looking straight, but slightly down and to the left and you will see a low platform. Jump to it to collect 3 Nails. Back up a few paces and jump on the platform just above you with a Silver Door. This is where the other Elevator would have taken you. Collect the Nails in the middle of the platform. Turn right and jump on the top of the Elevator to collect the Yellow Armor. Turn around and jump to the roof of the building of the Silver Door and collect the two 25 Health and Shells. Turn left and jump back onto the main building. Press the Button, which shall unlock a Door where the last Ogre was. Kill the Ogre just behind the Door. Follow the staircase all the way down to get to the bottom floor. To the left is the 3 Nails, so turn right and collect the two 25 Health at the end. Go back up one flight of the stairs to the middle floor, and go straight into the next room. Collect the two 25 Health and Nails, as well as the Silver Key in the middle of the room which causes 2 Scrags to spawn. Go to the Silver Door and kill the Ogre to the left. Follow the passage to a 25 Health. Turn around and hit the recessed Wall (#2). Follow the passage back to the beginning of the room, but keep going until you go into the Rune Gate.
Differences from Easy to Normal
- Scrag and Ogre in lower left corner of first Button room
- 2nd Ogre on lower middle platform of first Button room
- Ogre on pyramid/square building lower floor
- Ogre on pyramid/square building roof
- Pentagram of Protection on alcove above entrance to Lava platform by square building
- A Scrag by the highest building on the side that is entered in the walkthrough
- An Ogre by the closer Door that must be unlocked by a Button on the highest building
- A Shambler on the highest building instead of Ogre
- An Ogre behind the Door by the 3 Nails that must be unlocked by a Button on the highest building
- 3rd Scrag spawns when Key is taken
- 2nd and 3rd Ogre in final room
Differences from Normal to Hard/Nightmare
- 2nd Ogre on higher middle platform of first Button room
- Ogre by initial entrance used in walkthrough to Lava platform on left
- Ogre by intersection of Lava platforms
- Ogre on platform of 2nd floor of pyramid/square building towards the two 25 Health and Shells
- Shambler on roof of pyramid/square building by Ogre, as well as the 2nd Nails
- Shambler on roof of Silver Door building
- Only 2 Nails on lower platform of not used Elevator in walkthrough
Effects of Low Gravity
Ziggurat Vertigo is noticeable for having low gravity and this changes the environment of battle and the way certain weapons act, as stated below.
- Ogre Grenade attacks can reach much farther due to the low gravity. This also makes them less effective at close range.
- Since your Grenade Launcher fires slightly up, your Rockets will travel upwards for quite some time.
- Ranger jumps higher and free-falls on his descent.
- The Shambler is more lethal than normal on this map, especially when airborne, since the lightning attack can pin the player.
Secrets
| Secrets | ||
|---|---|---|
| (#1) | At the start of the level, grab the Pentagram of Protection and swim into the Lava immediately to the left. There is an underwater passageway leading to a Quad Damage and two 25 Health. Make sure not to grab the Pentagram until you are ready for this Secret. | |
| (#2) | Near the exit, there is a recessed Wall. Shoot it to pick up 2 Nails. | |
Enemies
| Type | Count | ||
|---|---|---|---|
| Easy | Normal | Hard/Nightmare | |
| Scrag | 4 | 7 | 7 |
| Ogre | 13 | 20 | 24 |
| Shambler | 0 | 1 | 3 |
| Total | 17 | 28 | 34 |
Deathmatch
Differences

E1M8 - Ziggurat Vertigo (Deathmatch)
- No 25 Health by start
- Super Nailgun on top of pyramid
- No Shells on high right alcove from pyramid, there is a Grenade Launcher however.
- After start Elevator, the first hallway to the left contains no Rocket Launcher, but a doorway connecting it to the Silver Key room
- After start Elevator, the second hallway to the left contains a Nailgun
- Super Nailgun on lower platform of first Button room
- No Yellow Armor on upper left alcove of first Button room
- Rocket Launcher to the right of the second floor of the square/pyramid building
- Double-Barrelled Shotgun on the highest building
- Only a 25 Health on top of Silver Door building
- Rocket Launcher on farther Door platform that previously had to be opened by the Button on the highest building
- No Silver Key
- Ring of Shadows at (#2)
Spawn Locations
- Right side of Lava platform by square building
- Left side of Lava platform by square building
- Behind pyramid building
- Alcove by (#1)
- In front of pyramid building
- Middle of Lava platform by square building
External Links
| E1M4: The Grisly Grotto | Quake Levels | E1M5: Gloom Keep |


