![]()
MUSEUM QUAKE or MUSEUM is a Single Player and Multiplayer level. This level features an art museum.
Numerous custom paintings line the walls, many made from scratch by Steve Rescoe, with various hidden things behind some of them. There is also a small library, as well as a section involving riding on a stone dragon. This level also features a functional Chthon battle at the end.
While Deathmatch is supported, bots such as The Reaper Bot tend to get stuck in this level, especially in the Slime sections.
Quick Level Completion
- Proceed forward through the entrance to the museum.
- Head through either doorway, then head up the staircase.
- Turn left to reach the wall, then turn left and head to the next wall.
- Turn right and head down the corridor, then turn right.
- Head up the flight of stairs, then turn left to reach the Silver Door.
- Turn left once more, then head down a flight of stairs before turning around.
- Head down the next staircase, then turn around and head down the next flight of stairs.
- Go through the doorway to your upper left, then turn around and cross the room.
- Turn right, then cross the next section before turning right.
- To your right is the Gold Door, head to the Crate just after it and hit it to open it.
- Collect the Silver Key, then return to the Silver Door and go through it.
- Turn right, then drop to the floor below before turning around.
- Hit the Shootable Button, then turn around to get on the Stone Dragon.
- As the Stone Dragon rises, jump to your left to land on a platform below.
- Turn left into the doorway, then turn right.
- Kill the Monster inside the cage to cause it to open, then head inside.
- Press the Button on the left wall, then turn right and go through the Teleporter.
- Turn right and step onto the Elevator, then let it lower.
- Turn around and follow the pathway to the wall, then turn left.
- Head to the next wall, then turn left and jump to the next platform.
- Turn right and follow the platform to the wall, then turn right.
- Jump up the small platforms, then collect the Gold Key to your right.
- Jump through the window, then jump to the structure in the far right before turning left.
- Follow the series of small steps to the doorway, then turn right.
- Turn right to head to the wall, then turn left before heading to the next wall.
- Turn left and head to the wall, then turn left once more.
- Head down the stairs, then turn left at the bottom and head to the wall.
- Turn left before heading down the stairs, then turn left to head down another flight of stairs.
- Turn left, then head to the upper left corner to hit a Button.
- Turn around, then head to the upper left corner of the room straight ahead.
- Turn left into the room, you are now at the bottom of the series of stairs between the Silver and Gold Doors.
- Return to the Gold Door and go through it.
- Turn left to collect the Rune.
- Cross the room, then press the Button to your left.
- Head to your right to press another Button.
- Press the Floorplate in the doorway straight ahead.
- Continue forward to exit the level.
Walkthrough
MUSEUM QUAKE
Drop down to the ground below, then proceed forward towards the pair of Doors. They will open, displaying the message "Welcome to MUSEUM QUAKE". Kill the 2 Grunts inside. Collect the two 25 Health, one beside each basement window to your left and right, then enter the building through the main entrance. Turn left to kill the Knight, then head down the corridor before turning right. Kill the Ogre beside the painting, then collect the 100 Health and Shells in the upper right corner. Return to the entrance room, then head around the ticket counter to the right to collect the Double-Barrelled Shotgun. Continue to the end of the corridor, then turn left to kill the Death Knight inside another painting room. Turn left towards the painting, then jump onto the structure to collect the Nails. Hit the Painting to reveal an alcove behind it, then collect the Nailgun inside. Return to the main entrance, then turn right and head through either doorway to pass the stone sculpture of a skull.
Head around the staircase, then hit the Shootable Wall at the rear to reach a corridor. Enter the corridor while collecting the Green Armor, then turn left. Collect the Shells, Nails, and 15 Health before turning left. Head down the next corridor while collecting the two 25 Health, Shells, and Nails. Ignore the Door that opens at the end, it just returns to the entrance, instead returning to where you picked up the Green Armor. Collect the Shells, Nails, and 15 Health before turning right at the end of the corridor. Head down the next corridor while collecting the Rockets, Nails, and 25 Health. Head through the Door at the end to return to the entrance, then return to the staircase you previously ignored. Head through either doorway at the top to reach a room with a series of paintings, turn left to look towards a painting of a Scrag wizard. Hit the Painting to reveal an alcove, then collect the 100 Health inside. Return to the painting room, then cross to the far side to see a picture of Laserhed with the message "Laserhed lives again". Shoot this Painting repeatedly to open a hidden alcove (#1). Turn around after appreciating the art, then turn left through the doorway to return to the staircase.
Head towards the corridor to your left, then turn left into the first doorway. Kill the 3 Rottweilers inside the room, then head towards the far side to collect the 100 Health. Return to the foyer outside, then turn left and continue to the end of the corridor. Turn left into the room at the end to enter a library, then kill the Grunt to your left and the Enforcer straight ahead. Head towards the second bookshelf, then turn left to collect the 25 Health. Exit the bookshelf row, then turn left and continue to the third bookshelf. Turn left to collect the 25 Health, then turn around and exit the row. Head to your right, to the checkout counter, to collect the Shells. Head to the back corner of the library to reach a small area with a light fading in and out, then hit the Shootable Wall to reveal a hidden corridor (#2). Return to the top of the staircase, then head to the side opposite the library before heading into the first doorway to your left. Kill the 2 Grunts and Enforcer inside, then turn left to collect the Nails. Return to the foyer once more, then continue forward to the end of the corridor. Turn right to kill a Death Knight to your right. Turn around, then head through a non-solid wall to reach a hidden room (#3).
Continue to the wall, then turn right before heading down the next corridor. Continue up a flight of stairs, then turn left into the doorway. Turn left to look down a staircase, then kill the Fiend at the bottom of it. Behind you is the Silver Door. Drop to the small platform jetting out to your left, then turn around to reach a hidden alcove (#4). From the Silver Door, head down the staircase before turning around to kill a Scrag. Head down the stairs, then turn around to kill a Scrag. Head down the stairs, then ignore the doorway to your upper left, instead turning around once more. Head to your left to collect two 15 Health and the Shells. Head through the doorway you previously ignored to reach a storage room filled with Crates, then turn left and cross the room. Turn right, then head to the far side of the room to collect the Shells. Turn around and head around the Crates, then kill the Vore. To your right is the Gold Door, proceed to the Crate just past it to receive the message "open this crate". Hit the Shootable Wall with the image of a Key on it, then collect the Silver Key inside. Head to the upper left corner of the room to collect the 15 Health. Return to the Silver Door, then turn left to look into an alcove that was previously hidden behind a Movable Wall. Kill the Ogre inside, then collect the two 25 Health.
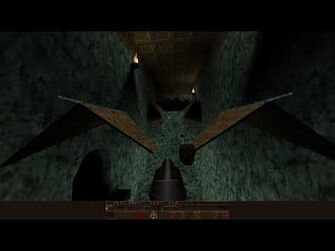
Head through the Silver Door, then turn right. The Floor will slide aside, dropping you onto the floor below. Kill the 2 Rottweilers straight ahead. Straight ahead is a pool of Slime, kill the 2 Grunts on the platforms on the far side of the room, 1 on each platform. Turn around, then head down the ramp to your right before turning left. Collect the 15 Health and 25 Health, then return to the floor above. Hit the Shootable Button on the wall across the Slime, this will display the message "The Stone Dragon will rise". Turn around, then get onto the Stone Dragon and let it rise to the floor above. Head onto the platform straight ahead, then turn around and drop to the platform just below the one you are on. Turn around to look into the room, then proceed forward before looking left. Kill the Grunt, then collect the Grenade Launcher and Rockets. To your right is an area below an Elevator, but it is blocked behind an invisible wall, so instead look over the Slime. Jump to the platform to your right, then turn right into the doorway. Straight ahead is a cage with a Death Knight inside. Proceed to the cage before turning around, then head into the doorway to your left to collect the Shells and Nails. Turn around to kill the Death Knight in the cage, this will cause the leftmost Bar to slide aside to allow access to the cage.
Enter the cage, then press the Button on the left wall to allow the Elevator you saw previously to lower up and down. Turn right and head through the Teleporter to reach the platform with the Elevator. Turn right and step onto the Elevator, then wait until you see an alcove straight ahead. Enter the alcove to collect the 100 Health inside, then turn around. The Elevator will lower slightly into a pit of Slime, causing damage to a player standing on it, before raising to the floor above. Move forward, past the Elevator, to reach a small ledge beside the Slime. Turn left to kill the 2 Zombies in the Slime. Follow the pathway to your right, then turn left and head to the next wall while jumping over the Slime. Turn right and head to the wall, then turn right. Jump up the series of platforms to reach the larger platform above. Collect the Gold Key to your right, then kill the Ogre through the window straight ahead before jumping through it. Collect the 25 Health to your left and 15 Health to your right, then drop onto the ramp straight ahead lowering into the Slime behind you. Drop to your left to collect the Nails, then repeat the process on the right to collect the Red Armor. Head up the ramp, then jump to the structure to your right before turning left. Follow the series of small steps to the doorway, then turn right. Turn right and kill the Enforcer, then head to the wall before turning left. Kill the Knight, then head down the corridor and small steps at the end before turning left.
Turn left to head to the next wall, then turn left. Kill the 2 Grunts on the small balcony and the Knight on the staircase, then head down the stairs. Turn left to kill the Death Knight, then head to your right to collect the two 15 Health. Turn left before heading down the stairs, then turn left to head down another flight of stairs. Turn right to kill the Fiend. Turn around, then head to the next room to reach a Button. Turn around, then head into the alcove to your right to collect two 25 Health and Nails. Press the Button, then turn around and return to the room with the Fiend. A Movable Wall has slid aside in the upper left corner of the room, turn left into it. You are now at the bottom of the series of stairs near the Silver Door, kill the Zombie and Scrag that have spawned in this room. Head through the Gold Door, then head to your left to collect the two 100 Health.
Turn left, then collect the Rune to awaken Chthon. When you went through the Gold Door, a Movable Wall slid aside below the entrance to the museum, you are now on the ramp leading back to the starting room. The middle of the room has had another Movable Wall that slid aside to reveal a pit of Lava where Chthon resides. Finally a Movable Wall has slid aside on the starting side of the room, revealing the exit area as well as the Buttons to control the Electric Terminals. To lower the Electric Terminals, the player must press a Button on each side of the exit wall, then stand in the doorway leading towards the exit to press a Floorplate that will electrocute Chthon. Once Chthon is dead, the Door sealing the exit will open. Enter the final room, then head into the Teleporter to exit the level.
Differences from Easy to Normal
- 3rd Grunt in entrance room.
- 2nd Knight beside entrance room.
- 2nd Ogre in Ogre painting room.
- Ogre in Nailgun room.
- Ogre on second floor of gallery, library side, beside staircase.
- Scrag behind Scrag painting.
- Spawn beside Laserhed painting.
- Pentagram of Protection in (#1).
- A Fiend spawns in the doorway of the room with the Fiend painting when the player enters it.
- Fiend in painting room with Quake logo.
- Ogre beside (#3), side opposite library.
- Fiend inside (#3).
- Scrag beside Silver Door.
- Ogre beside staircase next to storage rooms.
- Nails in storage rooms, behind Crates on side closer to staircase.
- Vore in storage rooms, side closer to staircase.
- 2nd Ogre in alcove beside Silver Door when Silver Key is taken.
- 3rd and 4th Rottweiler in room just below area after Silver Door.
- Enforcer beside locked Elevator in Slime section.
- Enforcer beside Grenade Launcher.
- Shambler replaces Death Knight in cage.
- Zombie in Slime close to Elevator in area near Gold Key.
- Scrag overlooking Gold Key.
- 2nd Ogre in room just past Gold Key.
- Zombie beside Red Armor ramp, side opposite Red Armor.
- Knight at top of staircase beside small balcony after Gold Key area.
- Enforcer on small balcony after Gold Key area.
- 2nd Fiend beside Movable Wall leading to staircase beside storage area, area after Gold Key.
- Ogre beside Button that opens area leading to staircase beside storage area, area after Gold Key.
- 2nd Zombie spawns in staircase beside storage area after nearby Button is hit.
- Scrag spawns in storage area closer to staircase after nearby Button is hit.
Differences from Normal to Hard/Nightmare
- 2 Grunts in the outer courtyard, across from the starting location.
- 2 Enforcers in entrance area, 1 in each corridor beside the entrance.
- 3rd Ogre in Ogre painting room.
- 2 Shells beside Double-Barrelled Shotgun.
- 2nd Death Knight in Nailgun room.
- Nails beside Nailgun.
- Shambler in middle of central painting room on upper floor.
- Spawn beside Scrag painting.
- 2nd Scrag behind Scrag painting.
- No 100 Health behind Scrag painting.
- Fiend in painting room with Fiend painting.
- Shells and Nails beside 100 Health in Fiend painting room.
- Enforcer in library, between second and third bookshelves.
- 2nd Shells behind checkout counter in library.
- 2nd Nails in painting room with Quake logo.
- Death Knight and Fiend in corridor leading to Silver Door.
- Shells beside Shootable Button in Slime section.
- 2nd Enforcer beside locked Elevator in Slime section.
- 2nd Shambler spawns in cage when first dies.
- 3rd Zombie in Slime below Gold Key.
- 2nd Scrag overlooking Gold Key.
- Death Knight between Enforcer and Knight in corridor just after Gold Key section.
- 2nd Enforcer on small balcony after Gold Key area.
- Death Knight on staircase just before intersection in area beside storage area after Gold Key.
- 2nd Ogre beside Button that opens area leading to staircase beside storage area, area after Gold Key.
- Ogre spawns at bottom of staircase beside storage area after nearby Button is hit.
- Vore spawns in storage area closer to staircase after nearby Button is hit.
- Only a 100 Health after the Gold Door.
- Vore beside 100 Health after the Gold Door.
Secrets
| Secrets | ||
|---|---|---|
| (#1) |  |
Continually hit the Laserhed Painting to reveal a hidden alcove. Collect the 2 Nails inside. |
| (#2) |  |
In the library, head to the upper left corner from the entrance to reach an area with a fading light. Hit the Shootable Wall to reveal a corridor beyond, then turn left and follow it to the far side to head through a Teleporter. You will land on the roof of the entrance of the museum while collecting the Quad Damage, then fall to the ground below. |
| (#3) |  |
At the doorway to the library, or the corridor on the opposite side, head towards the wall facing the opposite side to pass a non-solid wall and reach a hidden room. Collect the Thunderbolt and Cells facing away from the main staircase. |
| (#4) |  |
Drop to a ledge beside the staircase next to the Silver Door, then turn around to reveal a room. Turn left to collect the 15 Health, Yellow Armor, and Super Nailgun. |
Enemies
| Type | Count | ||
|---|---|---|---|
| Easy | Normal | Hard/Nightmare | |
| Rottweiler | 5 | 7 | 7 |
| Grunt | 10 | 11 | 13 |
| Zombie | 3 | 6 | 7 |
| Knight | 3 | 5 | 5 |
| Enforcer | 3 | 6 | 11 |
| Scrag | 3 | 7 | 9 |
| Spawn | 0 | 2 | 2 |
| Ogre | 3 | 11 | 14 |
| Death Knight | 4 | 3 | 7 |
| Fiend | 2 | 6 | 8 |
| Vore | 1 | 2 | 4 |
| Shambler | 0 | 2 | 3 |
| Chthon | 1 | 1 | 1 |
| Total | 38 | 67 | 91 |
Deathmatch

MUSEUM QUAKE (Deathmatch)
Differences
- 100 Health restored behind Scrag painting.
- No Silver Door or Gold Door.
- No Silver Key or Gold Key.
- Quad Damage on Shootable Button platform of Slime section.
- Rocket Launcher beside sealed Elevator of Slime section.
- No Bar sealing cage.
- No Electric Terminals or Buttons that control them, Door is already open when prior Gold Door doorway is walked through.
Spawn Locations
- Outer courtyard, beside basement window on Key Crate side.
- Storage rooms, Key Crate side.
- Beside Ogre painting.
- Fiend painting room.
- Beside Laserhed painting.
- Beside Scrag painting. (corrupt)
- Quake logo painting room.
- Beside prior Silver Door doorway.
- Beside Button near storage rooms.
- Shootable Button platform of Slime section.
- Alcove near cage.
| N/A | Custom Levels | Introduction |