![]()
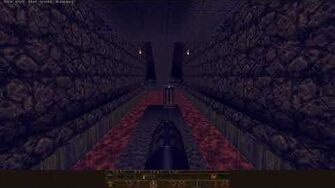
No campers palace. Die with honor! or No campers palace, die with honor! is a Single Player and Multiplayer level. This level is intended for 6-16 players in Multiplayer.
This level has a corrupt soundtrack directory as it searches for Track 1, which is a data track and therefore cannot be played.
Included with this level is a Demo showing how to get 100% completion.
Quick Level Completion
- Head diagonally to your left, around a windowed structure, to reach a Light.
- Hit the Light, then turn around.
- Drop through the set of newly opened Bars.
- Turn right, then drop through the next hole.
- Head down the ramp straight ahead, then turn right at the corner.
- Head forward into the Elevator, then ride it to the top floor.
- Proceed forward to the corner, then turn right again.
- Head down the ramp straight ahead, then drop into the hole.
- Turn left, then proceed forward to exit the level.
Walkthrough
No campers palace. Die with honor!
Step to your right to collect two 25 Health. Proceed forward while moving to your left to head up an Elevator, then collect the Super Nailgun from the middle of the room. Let the Elevator descend, then head to your right to reach another Elevator. Turn right to look into a tunnel, then step into it while killing the Enforcer. Head down the staircase straight ahead, then head to your left to collect the Double-Barrelled Shotgun. Turn around to kill a Knight, then turn left to look across the staircase. Cross the room to collect the two 25 Health, then turn right to collect the Yellow Armor. Return to the starting room and drop onto the Elevator, then turn right and drop above the Teleporter to collect the Nailgun. Head into the Teleporter to collect the 2 Rocket Launchers, then proceed forward to collect the 2 Rockets. Turn right before dropping to the ground, then head to the upper left corner to collect the Shells. Turn right to look at a staircase, then kill the Grunt to your right. Ignore the staircase for the time being, turning right to look back to the structure you were previously on. The far side of the room from the corner you are looking at is the starting location. Start heading back while killing the Shambler, Grunt, and Enforcer that have been alerted to your position. Head through the middle of the structure in the middle of the room to collect the Shells. Face the staircase side of the room, then look upwards to kill 3 Grunts on a balcony. Collect the Double-Barrelled Shotgun and Shells between the Teleporter and a windowed structure.
Head up the staircase you previously ignored to collect the 25 Health and Ring of Shadows at the top. Turn right to look down a corridor, then kill the Enforcer on the far side. Pass a hole in the ground that drops you through the middle of the windowed structure into a pool of Water, you will reach said Water via a different route. Collect the Double-Barrelled Shotgun near the end of the corridor, then open the set of Doors straight ahead. Jump onto the ledge, then head up the staircase. Drop into the hole at the top, then turn right to kill the Ogre. Proceed forward to collect the Grenade Launcher and Quad Damage, then drop to the platform below before turning around. You are on a small platform surrounded by a pool of Lava, cross to the far side of the platform to collect the Rockets. Use the thin lip surrounding the room, to the left or right, to reach the original bridge on the opposite side of the room. Jump onto the suspending railing, then jump onto the bridge proper. Look up to hit a Shootable Button, then turn right to see a Movable Wall temporarily slide aside and reveal an alcove. Note that entering the hidden alcove will cause a Secret sound to trigger, though this area is not counted as a Secret. Collect the 100 Health from the hidden alcove, then return to the bridge. Proceed forward through the Door to reach an intersection, then turn left to kill the Rottweiler. Head down the staircase to reach the pool of Water you previously ignored, the bottom of the windowed structure, then turn left to collect the Thunderbolt. Kill the 3 Rotfish straight ahead, then return to the intersection. Collect the Shells straight ahead, then drop into the pool of Water with Teleporter edges to reach another room. Collect the Ring of Shadows in the upper left corner and Cells from the lower left corner, then turn right to head through the Teleporter.
You are now on the balcony overlooking the starting room where you killed the 3 Grunts. Head to your left while killing another Grunt to collect the Pentagram of Protection. To your right is the Super Nailgun structure, look onto the roof to kill an Enforcer. Turn around to head back the way you came, then turn left to head down another section. Collect the Red Armor at the end, then turn left. Collect the Nailgun, then turn left to drop onto the structure where you got the Rocket Launcher. Drop to the ground straight ahead, then proceed forward to hit a Light that causes the Bars in the middle structure to open. Turn around and drop into the newly revealed hole, then turn right to drop into another hole. Kill the Enforcer on the platform to your right. You are now in a room with Lava that is surrounded by a series of platforms. Drop to your right to land on a doorway above a Teleporter. Collect the Shells, then turn right and drop to the platform below. Collect the Thunderbolt from the intersection straight ahead. Just ahead is the exit, but the doorway is too high to reach, you will need to use the Elevator to the left. Turn around and go through the Teleporter to reach the roof of the Super Nailgun structure. Collect the two 25 Health and Green Armor on this platform, then retrace your steps to the room you were previously in. Follow the ramp straight ahead, then turn right with the platform to collect the Nails. Ignore the doorway straight ahead, this just is the middle floor of the Elevator, and instead turn right. Drop to the platform below to collect the Quad Damage. Turn left, then jump to the platform straight ahead to reach the pathway of the intersection leading to the Elevator. Turn left and ride the Elevator to the top, then turn right. Follow the pathway forward before turning right at the corner. Proceed forward down a ramp, then ignore the hole to reach the far side of the platform. Collect the Super Nailgun, then turn around and drop into the hole you previously ignored. Turn right to enter the exit room, straight ahead is the Teleporter that will allow you to exit the level. Collect the 100 Health between you and the Teleporter, then head to the right of it to collect the 2 Nails. Go through the Teleporter to exit the level.
Enemies
| Type | Count | Notes | ||
|---|---|---|---|---|
| Easy | Normal | Hard/Nightmare | ||
| Rotfish | 3 (6) | 3 (6) | 3 (6) | The vanilla engine counts each Rotfish as 2 enemies. |
| Rottweiler | 1 | 1 | 1 | |
| Grunt | 6 | 6 | 6 | |
| Knight | 1 | 1 | 1 | |
| Enforcer | 5 | 5 | 5 | |
| Ogre | 1 | 1 | 1 | |
| Shambler | 1 | 1 | 1 | |
| Total | 18 (21) | 18 (21) | 18 (21) | |
Gallery
 (8 KB)")
Deathmatch
Differences

No campers palace. Die with honor! (Deathmatch)
- Double-Barrelled Shotgun under the stairs of the large courtyard.
- 2nd Shells in corridor with Water hole with Teleporter edges.
Spawn Locations
- Beside the hole leading to the bottom of the windowed structure.
- Corridor with Water hole with Teleporter edges.
- Bottom of staircase in Yellow Armor room.
- Elevator of platformed Lava room.
- On top of Bars in courtyard.
- Near Super Nailgun Elevator in courtyard, far side from 25 Health.
- Upper balcony of courtyard, near Pentagram of Protection,
- Rockets platform of Lava bridge.
- Top of staircase beside courtyard.
- Under the stairs of the large courtyard.
- Top of staircase leading to Yellow Armor room.
- Exit Teleporter room.
- Hole dropping player into platformed Lava room.
- Beside Teleporter in courtyard.
- Near Super Nailgun Elevator in courtyard, beside 25 Health.
| N/A | Custom Levels | E1M1: the Slipgate Complex |