![]()
| |
| Outer Base | |
| Game | |
| Unit | |
| Next Map | |
| Secrets |
3 |
| New Weapons | |
| New Powerups | |
| New Obstacles | |
| New Enemies | |
| Objective |
|
| [Source] | |
Outer Base is the first level of Unit 1 of Quake 2. It is short and simple - helping the player get used to the game's controls and combat.
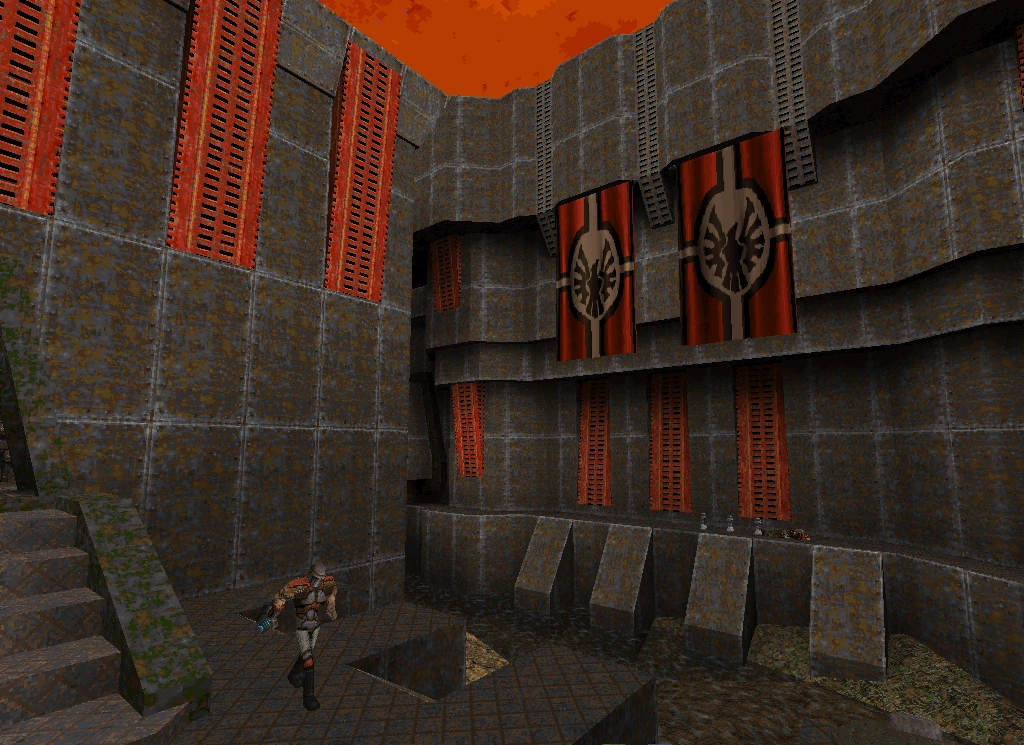
The game begins right next to Bitterman's crashed Drop Pod in a devastated room. The level features a main corridor, a small outdoor yard, and a sewer-like area filled with Water. Other parts of the level include a dark crawlspace leading to the sewer, a large, less-damaged room with several crates, and a heavily damaged storage area, in which most of the roof has collapsed.
The level's ambience is very dynamic - the sounds of flying ships and distant explosions can be heard constantly. It appears that the Base complex is being intensively bombed by Terran Coalition of Man forces.
The player's goal in this introductory level is simple - find a way to the exit elevator and gain access to the Installation. Along the way, they can pick up a Shotgun, Grenades and a few other useful items.
Quick Level Completion
- From the starting area, turn left and enter the corridor.
- Follow the corridor to its end, killing Guards along the way, until you reach a door.
- Go through the door and head for the stairs to the right.
- Follow the walkway to the elevator.
- Enter the elevator and press the button.
Walkthrough
Secondary Objective: Locate base installation elevator.
As the game begins, you will find yourself in a damaged room with explosive barrels ahead of you and a pane of glass beyond them. To your left is a damaged pillar with a doorway just behind it and a breach in the wall to the left of the pillar. Don't pass through the doorway yet. Instead, pass through the breach in the base wall. Ahead is a cliff with a small hole blown in the middle of it. Crouch and crawl through the hole, making sure to collect the Jacket Armor on the far side.
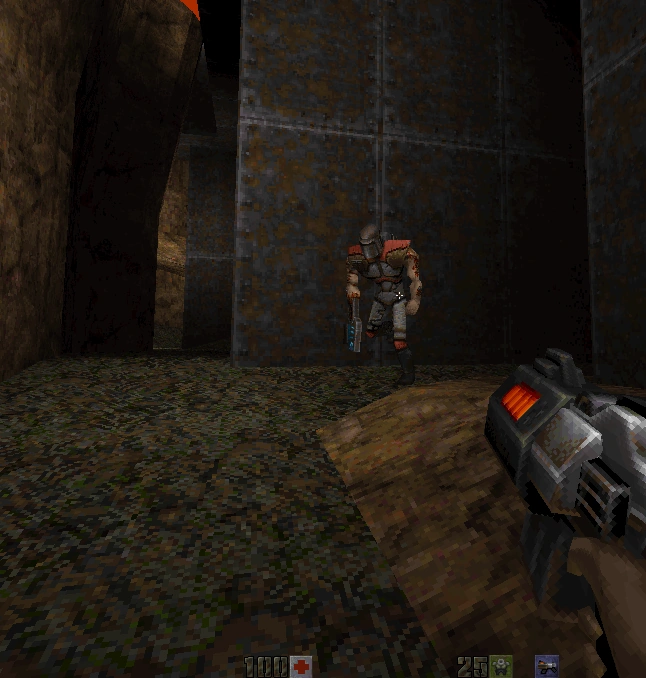
The first enemy of the game.
You will now be in a narrow passage between the cliff and the base wall. Follow the passage until you reach a more open area. A light guard waits to attack you from a half-hidden alcove; kill him with your blaster. He should not give you much trouble as he is easy to kill and you should already have the Jacket Armor. When the light guard is dead, approach the fallen metal beam and use it to climb through the hole in the base wall.
You will be inside another heavily damaged room. The top floor has two Stimpacks to collect and a shotgun guard on patrol. Kill the guard and pick up the Stimpacks, then take the staircase down to the lower level (or simply drop down). Two more shotgun guards should notice you here. The lower level also has a shotgun and two cases of shells to collect. Pick up the goods, and then return to the starting area. A shotgun guard may have arrived in the room.
Now it's time to go through the doorway you saw earlier. Follow the corridor, which leads you into a large room with light guards and shotgun guards on patrol. At this point, you should still use your blaster, as you are probably low on shotgun shells. There are Medkits to collect if you have taken any damage and a couple of armor shards in one of the corners. The outside courtyard also has two Stimpacks, a case of shotgun shells, and a silencer under the staircase that should all be collected. The window to the right of the hallway just beyond the large room leads to a balcony with several Stimpacks to pick up.
Once the area has been cleared, take the hallway past the room and follow it. Walk up to the door; it opens automatically at your approach and reveals another large room with an elevator in the middle. Kill the shotgun guard patrolling the room and ready your shotgun if you have not been using it.
The enforcers in this room present the first real challenge of the game.
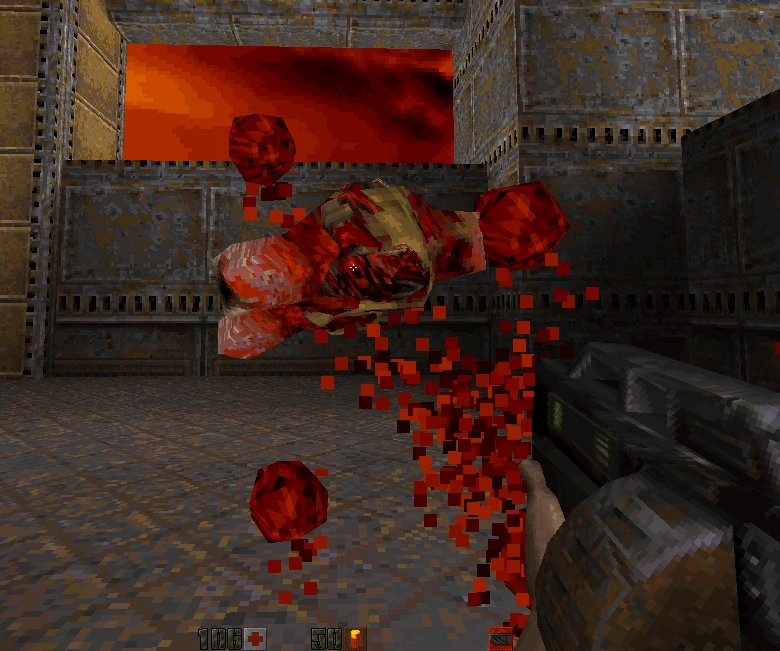
Enter the room cautiously. To your right there is an Enforcer, a deadlier enemy than the guards you have fought so far. He can kill you quickly if left unchecked; use the shotgun to bring him down. Another enforcer lurks behind the crates. Kill him, and then collect the two cases of shotgun shells from the edge of the elevator shaft.
Take the staircase leading up to the elevator and take out the enforcer patrolling there. Before taking the elevator, scour the area for more shotgun shells and any bullets that the enforcers may have dropped. Once room is clear, enter the elevator and hit the button to descend.
Differences from Normal to Hard / Hard+
- There are fewer Light Guards and more Shotgun Guards. The latter also has more accurate attacks.
- There are two armor shards in the second-to-last room instead of three.
- There are four enforcers guarding the lift rather than three.
Secrets
- #1) After grabbing the shotgun, shoot a hole in the floor and crawl through. Continue crawling until you fall out into some water. Swim right and then up to find the first secret. (2) Grenade and (3) Armor Shard.
- #2) In the main courtyard under the stairs. This is the outside area with the crates and the small reservoir to the left. Crouch under the stairs to find a Silencer.
- #3) On the ground floor of the room with the exit elevator and two Enforcer. Head under the stairs to the back wall. On the ceiling is a switch. Shoot it and the back wall opens. (2) Medikits (1) Grenade.
Deathmatch
Differences
Coming soon...
External Links
Coming soon...