
![]()
| |
| Railgun | |
| Production information | |
| Type |
Hitscan |
| Technical specifications | |
| Damage Per Hit |
|
| Maximum Ammunition |
|
| Fire Mode |
Semi-Auto |
| Ammunition Type |
Slugs (green) |
| Rate of Fire |
1 round every 1.5 seconds |
| Accuracy |
Extremely accurate |
| Range |
Extremely long range of 8,192 units |
| Usage | |
| Era(s) |
|
| [Source] | |
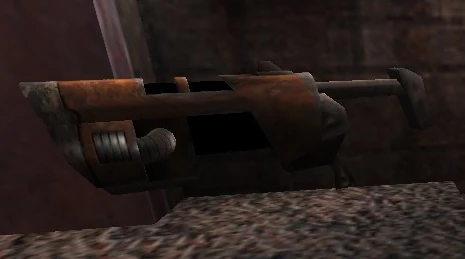
In Quake III Arena and Quake Live multiplayer, the Railgun, or "RG", is a weapon that fires a powerful, high caliber round that has the potential to kill an unarmored target at full health in one hit. The Railgun fires highly-accelerated hot uranium slugs which will pierce through flesh with ease.
There is a significant delay between shots; which is indicated by heat window above the Railgun turning magenta between shots and sounding a recharging noise. When that core part is white, it can be fired again. It should be used as the equivalent of a sniper-rifle, using the standard zoom ability.
In player slang its other name is "winstick" or "instawin". When players score two consecutive accurate Railgun shots without missing, it will grant them a medal with the "Impressive!" announcement.
Strategies[]
- When using the Railgun, remember the cooldown period between shots. Try to run away while the gun is charging up, because an enemy will definitely notice you when you fire it, if they haven't already. Try not to miss. If you miss and the opponent sees the trail, they'll know someone's watching them. They'll probably pick you out, and either choke that area with shots or counter-snipe you.
- Do not set your mouse sensitivity too high when wielding the Railgun, unless you are dead on with it. It will be much harder to actually align the crosshair and land a hit on people at longer distances. Additionally it will make your hit recovery much harder when working with a such precision hit weapon.
- Setting a good config may provide comfort and maintaining Railgun accuracy by optimized tweaks. Besides sensitivity,
m_accel,m_yawandm_pitchvalues must be set throughly for better tracking and flickshots. For flickshotting reliably, most players prefer to shutdown any mouse acceleration while using the Railgun. Yet with additional settings like sensitivity cap brought by Quake Live, mouse acceleration can be a viable option with some meticulous configuration. - RG emits a low hum, some kind of abyssal white noise which is audible by other players. Do not wield it when you expect an ambush or baiting attempt where other players can have a clue about your position. Even when walking around slowly, a RG's low hum can be clearly heard by others like the Lightning Gun's buzzing.
- A simple console command "
cg_railtrailtime #" defines the lifespan of the slug's trail viewed by your client. While this value is 400 (in milliseconds, translates into 0.4 seconds) by default, some players prefer this to be shorter to not distract them because Railgunners in a crowded match tend to not stay in the same spot for more than half second at all. Some others set that value up to 1100-1300 (milliseconds; as in 1.1-1.3 seconds) to tell when foes' Railgun is ready fire again to attempt a dodge. - Use it like a sniper rifle. Just hide within a long distance, listen for footsteps, teleporter sounds, weapon swaps, jumps and hit it quietly. Keep the important pickups (Mega, Red and Yellow Armor), high ledges, choke points, narrow sightlines or teleporter exits on your view. Try to peek across multiple long halls, doorways, down the balconies and between pillars using large open areas as a focal point. Long distance advantage can be used to wear down stacked targets on their restocking route from far ranges, where most of the conventional arsenal can't answer quick enough.
- If you're going against a Railgunner, don't jump towards them directly from medium-long range; keep your distance. Constantly strafe and jump around at direct sights. Take cover by steering at sides after a short stutter-step to trick them into missing. Try crouch-backpedal tap for height differences or a narrow circle strafe followed by forward taps at long range to dodge. When you have height advantage go forth and behind, crouch momentarily behind ledges or corners. Abusing one movement pattern too much will get you a steamy punch hole through your guts, so advance between them and try to take cover if you're at the wide open.
- When awaiting a Railgun camper at long distance sightlines, take cover or crouch-peek to surprise them. Crouching when you're already located would make you a slower target at the distance against any bold Railgunner who exposed themselves in the open. Crouch-peeking works better when peeking at narrow sightlines. Try to strafe in and out of cover with slight backpedal taps if you're sure a Railgunner already sees you in the open. The safest way would be either faking your motion by slightly showing youself from the corner then back off right away, or peeking momentarily by crouching behind the corner.
- Some maps have proper environments to take cover from Railgun fire. Pay attention to alcoves created by ramps or stairs, waist high cover plates or pillars placed genuinely. Remember that walking around will let you hear the humming sound of Railguns without anyone hearing your footsteps, thus keeping your position hidden.
- It's a definitive answer for counter-playing at 1v1 duels against the stack holder who dominates the important pickups. That's why it's called "insta-win". Most inexperienced players drop against a good Railgunner instead of positioning better. At high levels, Railgun counter-play can be prevented by positioning and listening for the humming. At any time, Railgunners can be outplayed by dodging, taking cover or throttle firing by weapon combinations. A railgunner must have been keeping the record of your pickups to ambush you, if they are in any way aware of the map they can tell where a railgunner would position themself to catch them off-guard.
- The Railgun is a great finisher weapon just like the Shotgun. The difference being Railguns work best when your opponent is far away from you or you are about to ambush your opponent on his/her restocking route from long range through important pickups as bait instead of getting a drop on the opponents at low grade recovery goodies or narrow gates.
- Don't even think about using the Railgun in enclosed areas. The Railgun is most effective on vast open yard maps (like Tier 4, Tier 5) or open space maps of Tier 6; where you can shoot anywhere. But if you're in a room that's extremely tiny, do not use the Railgun or you won't have a hiding spot while cooling down even after landing a shot. Avoid using the Railgun in small rooms and narrow pits lacking depth or cover.
- Do not use this weapon in close quarters. Its cool-off time makes you very vulnerable to rapid fire weapons or short effective distance arsenal. If you are nearing a narrow corner and have the Railgun out, take out another weapon until you're out of the area. Unless you are a real expert and can hit your opponent with the first shot of the Railgun, it's not worth the risk. While it is technically possible to score a kill in close ranges, it requires flawless timing and leading the shot, which can be very difficult to achieve when you run into someone.
- High ground. Whatever you do, if you plan to be a sniper in the chaos of crowded matches; do your work on high ground! If you're below everyone else, people will shoot you to death, outnumber or humiliate you. When almost all important items are collected on the map, you have nowhere to go but higher floors to evade splash damage. Height advantage will allow you to have somewhere to retreat always by dropping down, taking a behind path or peek at.
- Railgunners generally position regarding to last important item's spawn location. If the last important item is at below floor, then Railgunners will choose a high porch around it. If important items are on a high pedestal or platform, then they'll sting you from below or abuse small sightlines without exposing themselves. If you can't locate them and each important item is already taken, fake your movement nearing known high sight gaps or doorways. Railgunners are predictable but forceful.
- If you're effectively being chased or flushed away when Railgunning, travel low but deliberately seek stairs to climb and retreat, stand near high ledges or teleporters to surprise. As it's defensive to stay high or far away in open areas, staying below towering ledges to abuse your hitscan capabilities against high targets are equally good. Airborne targets above you will be more predictable compared to someone dancing at the below floors after you take a shot once.
- Combo rapid fire and single fire weapons together to flush out any camping Railgunner from high or even ground positions. Try to pressure fire at long distances behind a cover with fast firing weapons like the Plasma Gun or HMG, to avoid getting punished for pre-firing or wide array spraying in the open. After prefire, quickly switch to your single fire weapon of choice then send a shot at them to flush their position.
- Try to disorient railgunners with Rocket Launcher blasts around walls. Rocket Launchers are a nice answer for blocking narrow sightlines across high floors but slow for catching up to them when you're located or below them without any cover. It requires some rapid fire beforehand to pressure a Railgunner if you lack any cover and spotted. For rare instances, abusing wall or ground ricocheting grenade potshots can flush their position down below without even risking yourself.
- Shoot zoomed in. It's hard to shoot an opponent on the move without zooming for an inexperienced eye. However, scoped-in players generally lack awareness to their surroundings, making them easy picks for stealthy players. Don't try to zoom in for prolonged times without having positioned properly. If someone sneaks upon you, your best bet would be doing wide twitches and leading the shots in a hurry.
- For catching a railgunner off-guard you need to know their possible positioning and when they can appear. One may need to backtrack silently, by going off their route from important items and peek at the possible porches and position themselves to deal splash damage to shake them off or flank them with rapid fire. However, it's possible to confuse and bait a railgunner, if you stray away from your restocking path by doublebacking or climbing up.
- Railgun requires predicting skills and practice to be effective. Practice on bots at various skill levels at different maps until you get the hang of it. Map knowledge for important pathways, sight of gaps and memorizing item spawn spots immensely help when using RG and reading your opponents. The Railgun is one of the weapons where specific map knowledge pays off in the long run. Try to position yourself for creating a cannonic sightline seeing across multiple hallways, using open areas like a focal point.
- Coordinating elbow-wrist turns depends on distance and your movement flow. Quirky twitches and flicks come with experience and practice. In a general sense you can't go wrong if you compensate your shot for the center mass of moving foes by minding the stalling trail as you steer. When running around small flicks or leading the shot with movement, flow may work at the medium distance. Yet remember a small twitch or an unnecessary re-adjust on the move will make you miss your target by a large margin at the long range. Focus on compensating and watching enemy movement and trail of belt area at long distances to track efficiently, then decide if it worths standing for a moment.
- Remember that pigeon-holing at one sniper porch the entire match won't hepp you much as players who move around will get higher armor-health stacks than a sniper who sits at a platform entire match. Eventually you'll get located and will drift off to look for health globes where you'll be predictable and can be shut down entirely by visiting the health globe spawns. It's safe to say, most sniper porches will be just next to health globe spawns in crowded matches.
- If you're really desperate for kills, as bad as it is to do, stand on the other side of teleporters and shoot anyone who goes through it. The same tactic also applies to bouncepads and acceleration pads. Bouncepads make players hover rather slow at the peak point, makes them easy airborne kills. Railgun shots kill the momentum of airborne players flung by acceleration pads, sending them whirling away from their destination, unless they air steer to resist it.
- If you hit someone with a Railgun mid-battle, they'll (most of the time) be very low on health. So the best choice would be to switch to the Machine Gun to finish your opponent off if long distance allows it or the foe starts to retreat, rather than attempting to get another clear rail hit. If you missed their track after landing a shot, it'd be safe to presume they retreated for a few seconds to look for standard health pickups rather than going for important items where they'll risk the stack further.
- Use a tactic called tracing. Use your Machine Gun to "trace/track" the opponent. Once you can easily predict their movements, cease fire for a moment to quickly switch to the Railgun and fire as you predict the next move. This expandable method allows you to get a better hit/miss ratio, as well as allowing you to chip away health and weaken foes. Give you a chance to only use a single slug on the fight as a finisher.
- Note that experienced players will switch movement, dodging tactics frequently, throttle fire before you can react and position themselves better if they catch on to the tracing strategy. Swap between your fast fire rate and finisher weapon frequently at first contact to fake it and spoil your act. If they jump early, just punish them with a Railgun. Keep long distance and use the Zoom function for better target tracking practice.
- Since damage was a bit too high for an pinpoint accurate sniper compared to other weapons, it's lowered in Quake Live to 80 damage per hit. In the expansion pack Team Arena, the rail shot's damage is reduced by longer distances to keep a balance, foreshadowing such a change. While other burst damage weapons remains untouched, and have the very same value of 100 damage per hit much like in classic Quake III as they were all projectile-based and have to suffer flight time.
- Haste or any of Team Arena's constant power-ups (namely Ammo-Regen or Scout) can speed up the cooldown if you have it.
Advantages[]
- Perfect accuracy, hard to dodge unless expected.
- Hitscan, requires little-to-no leading.
- Perfect ambush weapon with satisfying damage burst.
- Foremost choice of counter-playing, controls important items.
- Forceful, even the possibility causes foe to position better.
- Very long effective range, takes a weapon combo to return fire.
- Effective against hovering airborne targets, halts momentum.
- Can kill an unarmored target at 100 health or less, in one shot in Quake III Arena.
Disadvantages[]
- Skillful hands needed to use at long ranges to compensate.
- Takes more than a second to charge after each shot.
- Leaves a visible projectile trail with every shot.
- Becomes predictable after first ambush shot and punishes missing onward.
- Weak against cover, lacking splash damage.
- Aligning a shot becomes a main issue when focus fired or at close.
- Zooming-in or waiting to use it effectively distracts from main game flow.
- Emits an audible abyssal white noise when wielded.
- Reduced damage per shot in Quake Live.
- Damage effectiveness decays by longer distances in Quake III: Team Arena.
Trivia[]
- Unlike the Quake II counter-part, 'III Arena's Railgun does not have a manual cartridge reload, but a delay between shots due to an overheated core.
- The weapon emits a low hum just like the Lightning Gun, and it can be heard by players who are sneaking around.
- To player's luck, Q3 comes packed with premade config files by developers themselves. Just fiddle around in game files and you'll find a packed group of ".cfg" files that you can run by exec command anytime once you learnt its name.
- Quake community created guides about making and using configs effectively. They're so easy to access via Steam, and helps about tweaking everything you can find over the game's settings.
Gallery[]
")
| Quake III | ||
|---|---|---|
| Characters |
Tier 0 (Crash) · Tier 1 (Ranger · Phobos · Mynx · Orbb · Sarge) · Tier 2 (Bitterman · Grunt · Hossman · Daemia · Hunter) · Tier 3 (Gorre · Wrack · Angel · Slash · Klesk) · Tier 4 (Lucy · Tank Jr. · Biker · Patriot · Anarki) · Tier 5 (Razor · Visor · Stripe · Keel · Uriel) · Tier 6 (Bones · Cadaver · Doom · Sorlag · Major) · Tier 7 (Xaero) | |
| Weapons | BFG 10K · Gauntlet · Grenade Launcher · Lightning Gun · Machine Gun · Plasma Gun · Railgun · Rocket Launcher · Shotgun | |
| Ammo | Bullets · Shells · Grenades · Rockets · Lightning · Slugs · Cells · BFG Ammo | |
| Powerups | Armor(Light)(Heavy) · Armor Shard · Battle Suit · Flight · Haste · Health · Invisibility · Megahealth · Personal Medkit · Personal Teleporter · Quad Damage · Regeneration | |
| Hazards | Acceleration Pad · Bounce Pad · Fog · Fog of Death · Gate · Lava · Pendulum · Slime · Teleporter · Void · Water | |
| Expansions | Team Arena | |